When I checked the food stores just before Labour Weekend, I was happy to see that just right on cue, the rest of the summer growing root crop tubers were getting sprouts. We sorted out the smaller ones to plant for next season’s crops and quickly used up the other bigger ones in dinners after removing their shoots. Once root crops start to sprout, they go all soft and lose their nutrients and texture/taste, as they put all their effort and goodness into feeding the new “plants”….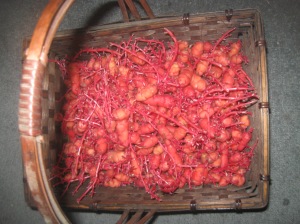

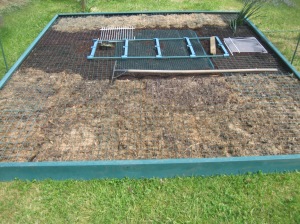
This is the new Potato and Yam patch that I made and mostly planted – yes we have had to cat and bird proof it, as the cats are not too keen on keeping the birds away, they would rather sleep on the bed all day! The gap in the mulch is not planted yet, because as we find more sprouting potatoes in the last basket of stored spuds, we will plant those ones out as we get to them, which will increase our harvest period.
I also learned something from reading an old Organic Gardening in NZ book that I bought cheap, 2nd-hand from a local book shop. To increase your yield of potatoes, cut your seed potatoes up so that there is only 1 sprout left on each piece you plant. This way, the potato seed puts all its energy into that one shoot/plant and produces larger potatoes than if you plant a whole seed potato which will then concentrate on making heaps of shoots/plants – producing a lot more smaller, less usable potatoes.
We have invested in a wood chipper too, as in the recent storms and high winds all our pea-straw mulch had blown away. People were saying that bark chip or wood chip was better and did not blow away the same, and I had also been looking into the Back to Eden videos online (see here: https://vimeo.com/28055108) and considering what they are doing too and the benefits that we could obtain by incorporating a few of their most basic principles into what we are doing here.
Although I do not agree with all of what they do and say (there is no concept of companion planting or potager gardening – where everything is grown in together as it is in nature, and weeds are considered something bad rather than just plants in the wrong place with a good use – usually for medicinal or compostable purposes), I did find the idea of bark/wood chip to be interesting enough to try. We decided with such huge gardens, buying bags or trailers of it was just not economical, especially as we have many trees and hedges on our property that always need cutting and we had previously been paying to dump what we could not burn in the fireplace or wood stove/oven. We reckon now that it will take less than a year to save the money that the chipper cost us in lack of dumping fees and not having to buy bark!


Above is just some of what we managed to chip and lay for mulch on our Labour Weekend; it is nearly the whole “big ground garden” (as we call it), ready for the next lot of plants. The Rhubarb is already looking happier now it is being kept more moist.
Elsewhere in the gardens, the first lot of Potatoes that I planted in another raised bed garden, are growing well and have now pushed through their first layer of grass clippings that we mulched them with. We will continue to build this up with more and more as the summer goes on, to make the plants grow taller and set more potatoes.
We had attempted to grow Potatoes in the ground here, but soon found the property was infected with the dreadful wireworm and we lost most of our first crop. Since then, as much as we dislike using anything at all not organic on our property, for the Potatoes, we have had to build raised bed gardens and line them with weed matting in an attempt to keep the wireworm from attacking and destroying our crop. This has been mostly effective, and we also Neem. We put Neem granuales down when we plant the seed Potato sprouts, then again on top of this, and again on top of the soil used to cover them. Then after each layer of mulch, we Neem again, as the rain and watering will wash the stink of it down into the soil and mostly keep the critters away.
We had tried the ideas listed under organic controls for wireworm (as our property is organic), but none of them really seemed to work for us. We have found Neem the best so far. Some sites also suggested “mustard gasing” the wireworms, but I had friends who tried this, and it also did not work. They are very hard to get rid of :(.
It does not work to dig up the soil to disturb them if you are growing Potatoes, as sadly Potatoes hate having their roots disturbed and you will lose most of your crop if you do this. It did not work growing Potatoes in the warm here, as the wireworm still were just under the surface and causing havoc. One of the only things that DID work somewhat (other than Neem), is planting Calendula and Marigolds in with the Potatoes, both of which keep soil borne insects and nematodes away from plants. Now that the Potatoes plants are established and it is warm enough for the Marigolds and Calendula to grow and flower, this is our next job – to plant them out all through the Potato gardens! If you would like to try some of the natural methods recommended for wireworm for yourself that did not work for us, see this link:
http://www.planetnatural.com/pest-problem-solver/garden-pests/wireworm-control/
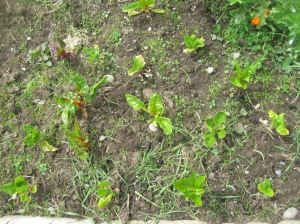
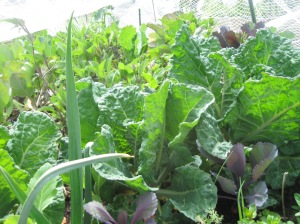
The Swiss Chard and Silverbeet that I planted out a couple of weeks ago is already growing well, we have added onions to the mix and soon will put in beetroot. There is also Celery and Calendula growing in the same plot, as we companion plant.

I will mulch this ground too as soon as the Beetroot is in, as that helps the soil to retain its moisture – something all these plants, especially the root crops needs over summer – and also as it helps keep the weeds down, as you can see them all growing back already! As much as I dislike the term ‘weeds’ I do use it now and again, but I prefer to call these plants ‘misplaced’ and remove them to somewhere more appropriate 🙂 And no-one really wants couch grass competing with their vegetables in their food gardens, although it does have a medicinal use. I also have a favourite saying that I often trot out, “I don’t have any weeds, I only have plants that I don’t know how to use – yet!”
Our newest greenhouse is proving to be a big boon! It has so far withstood the equinox gales of winds around 160km/ph and many strong storms and gales. So it has done better than the last one! But then this one we did tie up/tie down so that not even a small hurricane could move it, lol – but perhaps a big one might?! It has I think 9 tonnes of transport strops holding it to the ground, and 2 rows of bungy tie-downs holding the plastic onto the frames. These greenhouses are $300 ea from TWH (The Warehouse in NZ), but we got 2 for half price and have been rapt with them. I do not however think they would still be standing if not for the alterations!
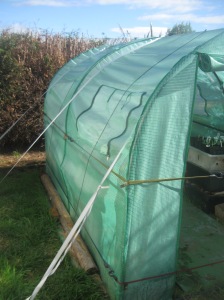
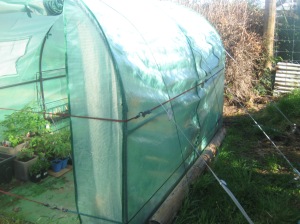
The 2 tiny wee weak strings that it came with, along with the piddly plastic stakes can be seen holding the opening windows down (as the wind rips them open when its bad). We bought the biggest, gruntiest, heavy-duty steel tent pegs that we could find, and tied the transport strops onto them (they go in the ground 30cm and are 6mm wide) and we used logs from the forest and bricks to seal up the edges of the greenhouse. Ok, so when I want to get into it, I have to jump over and under the 2 rows of bungy cords to do so, but it’s a whole lot better than it blowing away – again!
PHOTOS TAKE PRE- LABOUR WEEKEND OF THE NEW SEEDLINGS:


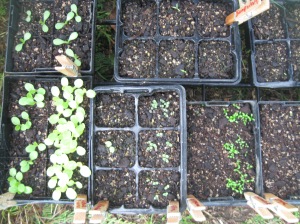


The difference between last weeks growth (above) and this weeks growth (below) is phenomenal and it is easy to see why we are loving our new greenhouse so much!
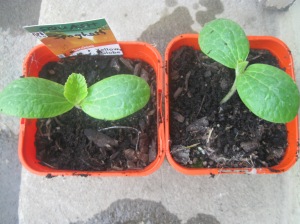
PHOTOS TAKEN POST LABOUR WEEKEND SHOWING THE HUGE GROWTH


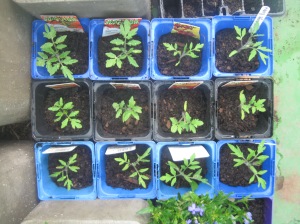

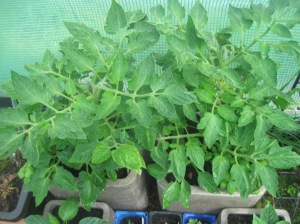

You will see our containers of Curcubits growing in the lush, moist warmness of the greenhouse – which in the deep cold south, is a Godsend. We would not usually be able to plant them out until after mid-November when the last frosts finish, if we did not have the greenhouse, and that means they can’t grow long enough to get big. The Solanacea are also going really well, the 1st lot and 2nd lot of Tomatoes are already flowering, and once again they would not be able to be put outside yet. So we are looking forward to the best summer harvest we have had here in years! 🙂
As to the rest of the crops, the Broad Beans are flourishing with flowers, but they have got Chocolate Spot as it has been SO wet and cold the last couple of weeks. And nothing I have done has improved the situation either, so it will just have to stay there. Thankfully it does not really harm the plants, and I removed all the really badly affected bottom leaves next to the damp mulch and soil, and put them in the rubbish bin. I have done all my usual fungal infection treatments to change the alkalinity of the fungus, but alas it is just too wet and nothing worked. I tried Baking Soda Spray, Vinegar Spray, Seaweed Spray and even eventually gave them Copper Spray – which did have the most effect, and it seems to have slowed the spread. I could have also used Neem Oil, but I try to save that for the fruit trees, so I did not use it.
So “chocolate spotted Broad Bean” plants we shall have this season! Like it or not.  At least the spotty leaves does not affect the plant or the beans that we are looking forward to, and they are still growing very well as there has been some sun as well.


The taller varieties of climbing Pea’s I planted out a few weeks ago are also doing well, and although they have also suffered from a bit of dampness, it has not so far translated to leaf mould or spot, thank goodness. I have companion planted the Peas, and are just waiting on the Turnips, Carrots, Radishes and Onions to come up. The first 3 are fine to be planted near Peas, but keep the Onions furtherest away, and if possible plant your Onions near your Carrots, as it helps to deter Carrot Fly.
The smaller Pea (dwarf varieties), I have planted out amongst the other plants in the raised bed gardens, as most of them do not need staking or netting to climb up. The few that do, I managed to slide a piece of mesh in-between 2 of the gardens and stake it along both sides, so that Pea’s grown on either side of it can climb up. 🙂
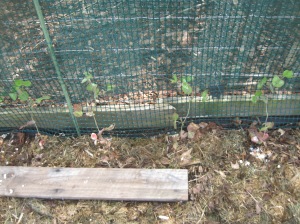
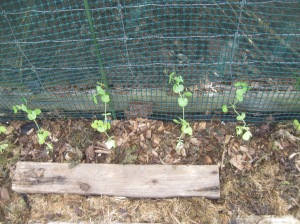
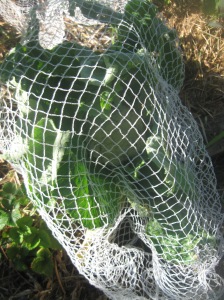
I also had to put stakes lying down across the baby Pea plants as the birds have tried their best to destroy them. If you look at the nice photos on the left of everything all tidy and the bug barriers in place, then the one on the right a couple of days later, you will see everything strewn everywhere. The little blighters had dug up all my Peas to get to the worms, and left the plants lying dying in the sun. Thankfully I had an urgent thought to get up early and check my Peas, or I would have lost them. The poles/stakes lying cross ways over the garden over the Peas seem to be working. 🙂


The last of the Winter Mesclun and Brassica’s are about to be removed:


You might notice the winter Mustard going to seed here, that is because I allow them to do this for various reasons. 1 is that the bees LOVE the flowers of the Brassica family, 2 is that it allows the Cabbage Caterpillars something to feed on which draws them away from my eating crops – and everything has a right to eat, right?! and 3, is that I collect the seeds from my Mustard to get my own Mustard seeds that I use as seasoning, and I also grind them up to make Mustard paste as well. They are useful!
I also let the Chinese Cabbage (Pak Choi) go to seed as well, as we pick the seed heads and eat them as baby sprouting Broccolli – they taste just the same, look just the same and are far easier to grow and more prolific! We also eat the flowers and flower heads, they are yummy and very healthy. I have covered these ones as we protect the plants that we are eating/going to be eating, and let the bugs feast on the ones we don’t need to eat. That way we all get to share the good of the garden. It does not bother me if the flowers poke out of the net a bit, as the bees LOVE them!
Under the covers of White Cabbage Butterfly and Bird netting (below), other already planted summer crops are really getting underway. There are Strawberries forming everywhere you look and they are producing prolific amounts of flowers. The lovely Florence Fennel is looking really gorgeous, the Silverbeets are nearly ready to pick and the Burdock will not be long before I did it out of the ground to get to its precious root and replant another one, that is coming along in a pot to take its place, although in a slightly different part of the same garden. The next lot of Savoy Cabbages are hearting up to be picked and the other winter planted Brassica’s are really starting to grow now. I always like to get a jump start on spring by planting Brassica’s out over winter as although they mostly stay dormant, they do start taking off as soon as the weather warms up a bit and then you have a lovely spring harvest waiting for you!
Potatoes and Borage are coming up everywhere amongst the other greens and as soon as the green are picked the Potatoes will be able to take over. My next mission is to get Marigolds and Calendula planted through this garden to protect the plants from all sorts of nasties, and especially the Potatoes – from wireworm. There are newly planted Tat Soi and Chinese SlowBolt Cabbages growing too, but these ones are tiny as they were only planted this spring. But they are fast-growing so they will be up and away before the ground is needed for the bigger, longer growing vegies.
There is still even a little of the last Miners,Winter Lettuces and Mesclun Greens in the garden, which we are appreciating in our salads until the new ones grow bigger, and the Spinach is really coming into its own too now as the cold winter is all gone. I find that although it IS frost hardy and cold tolerant, it does like a bit more warm to grow really well, so this time of the year and late summer thru into Autumn is best 🙂


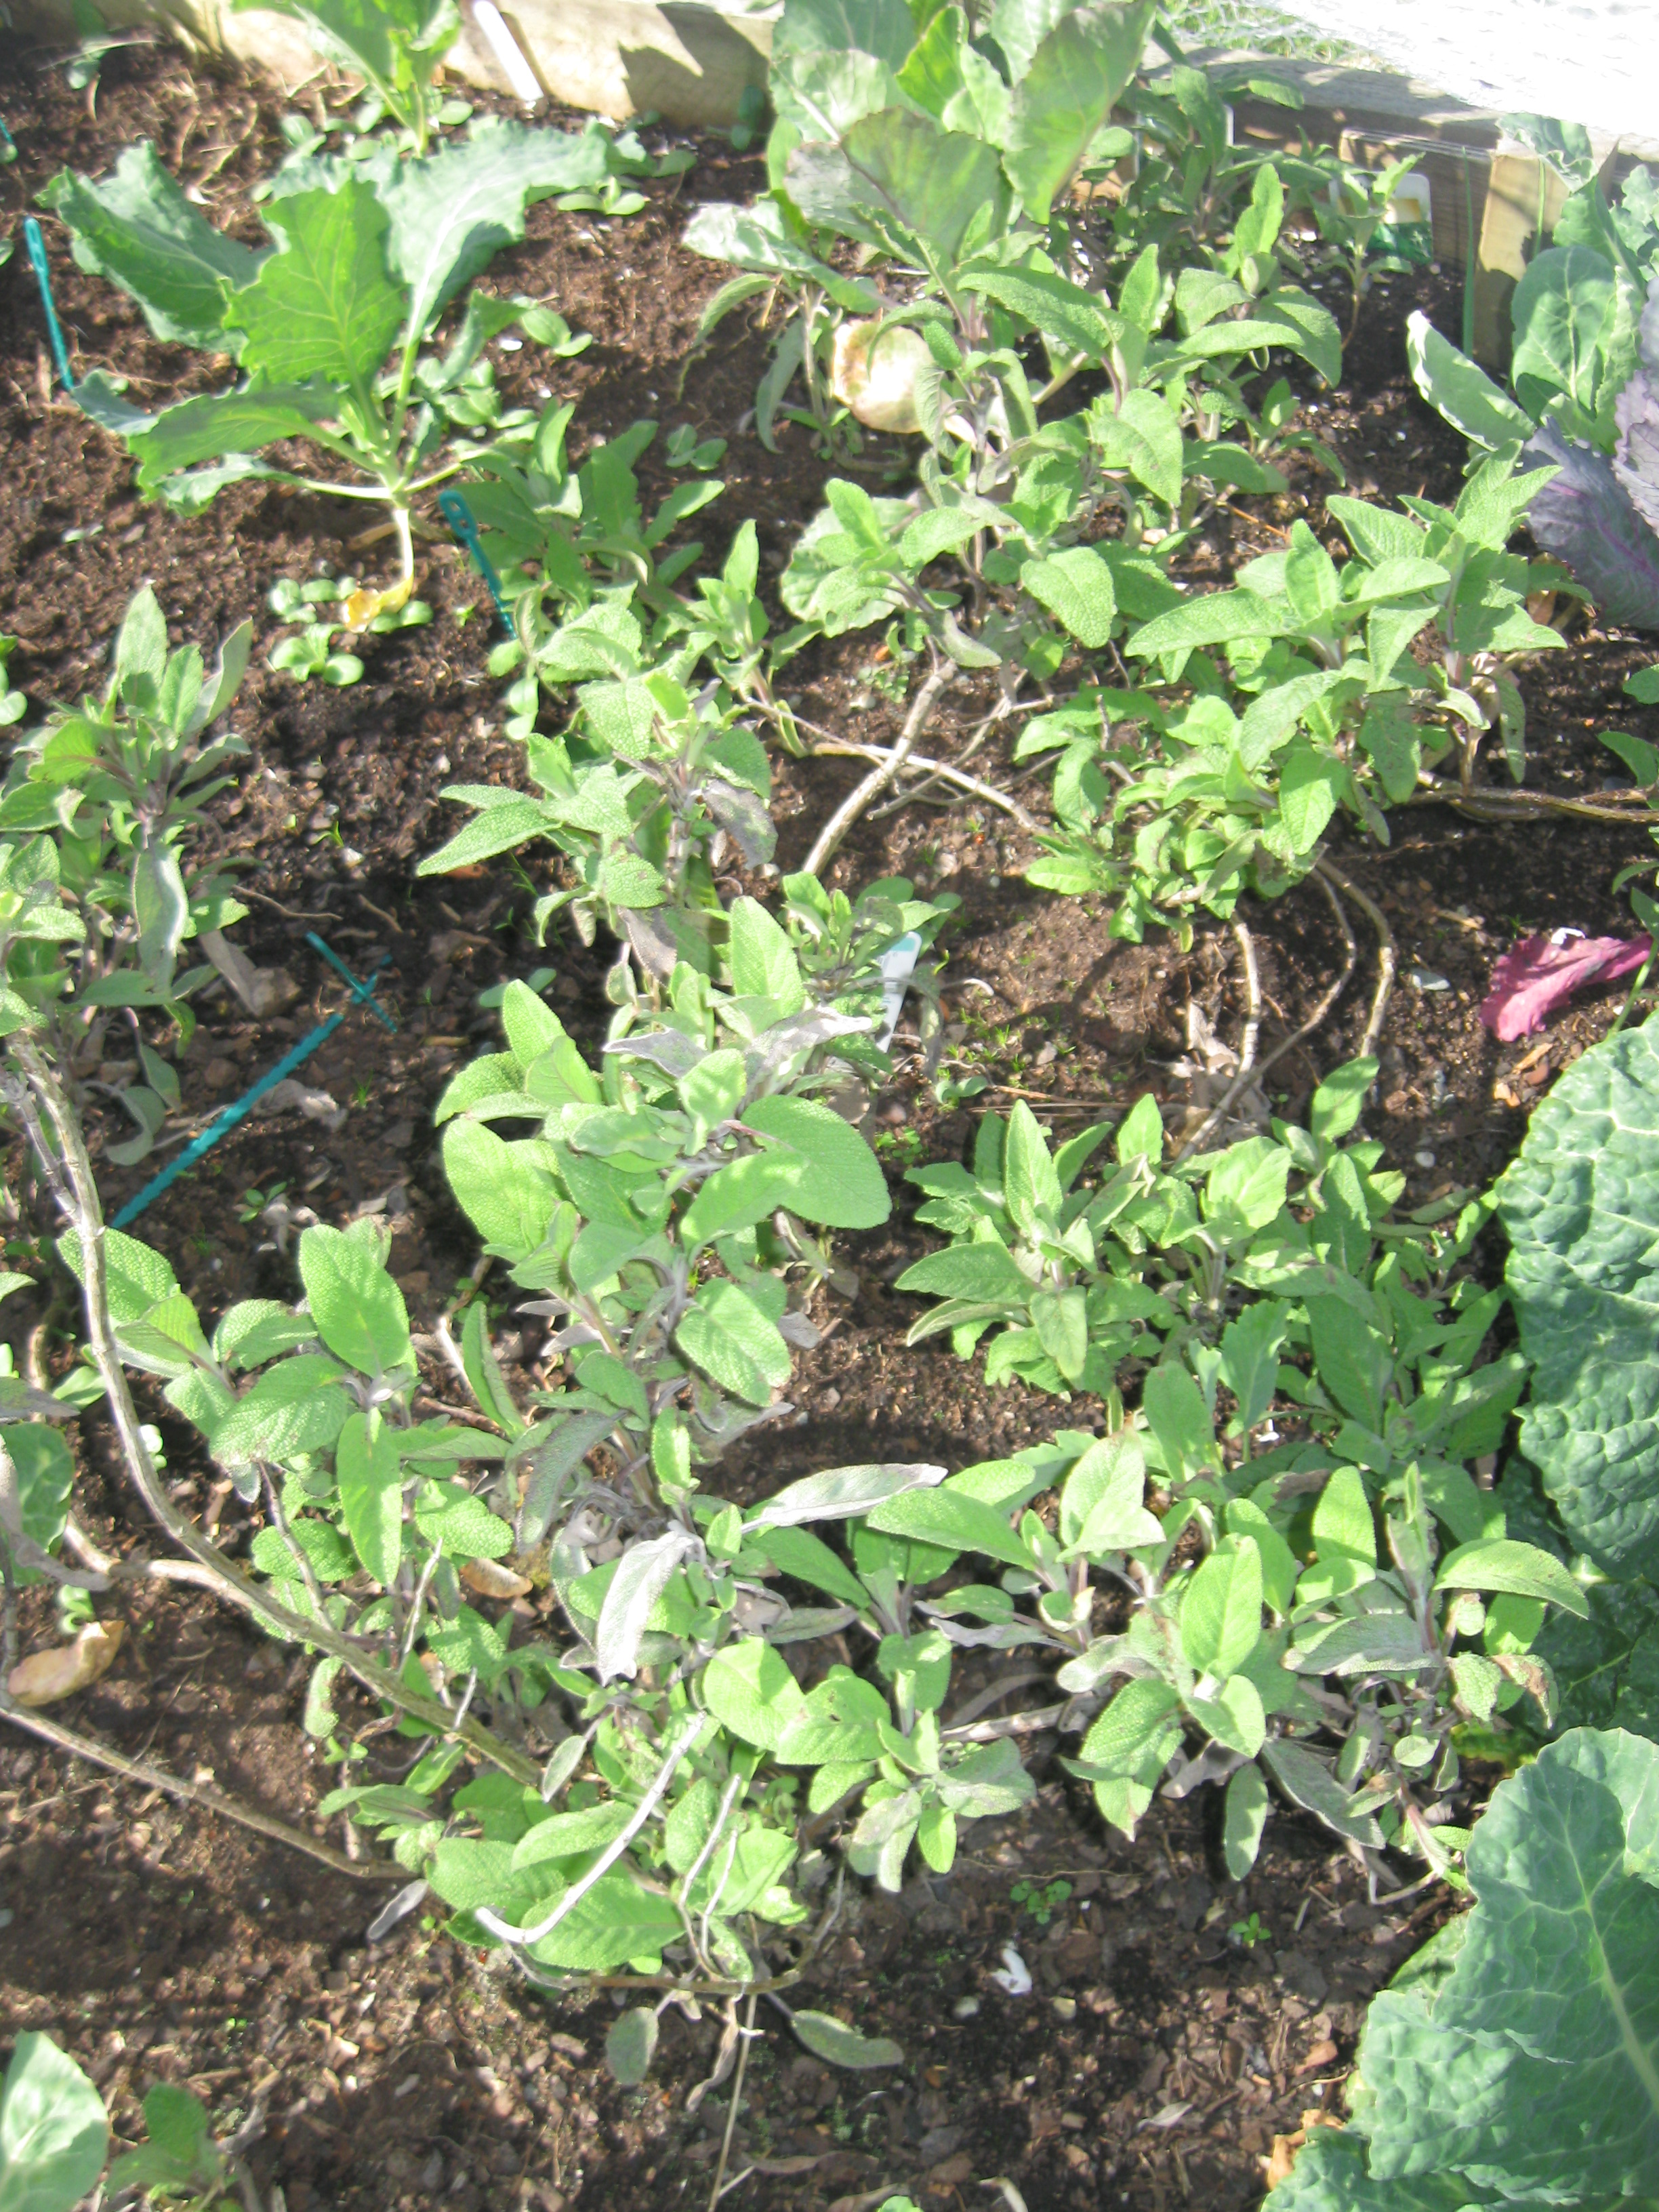
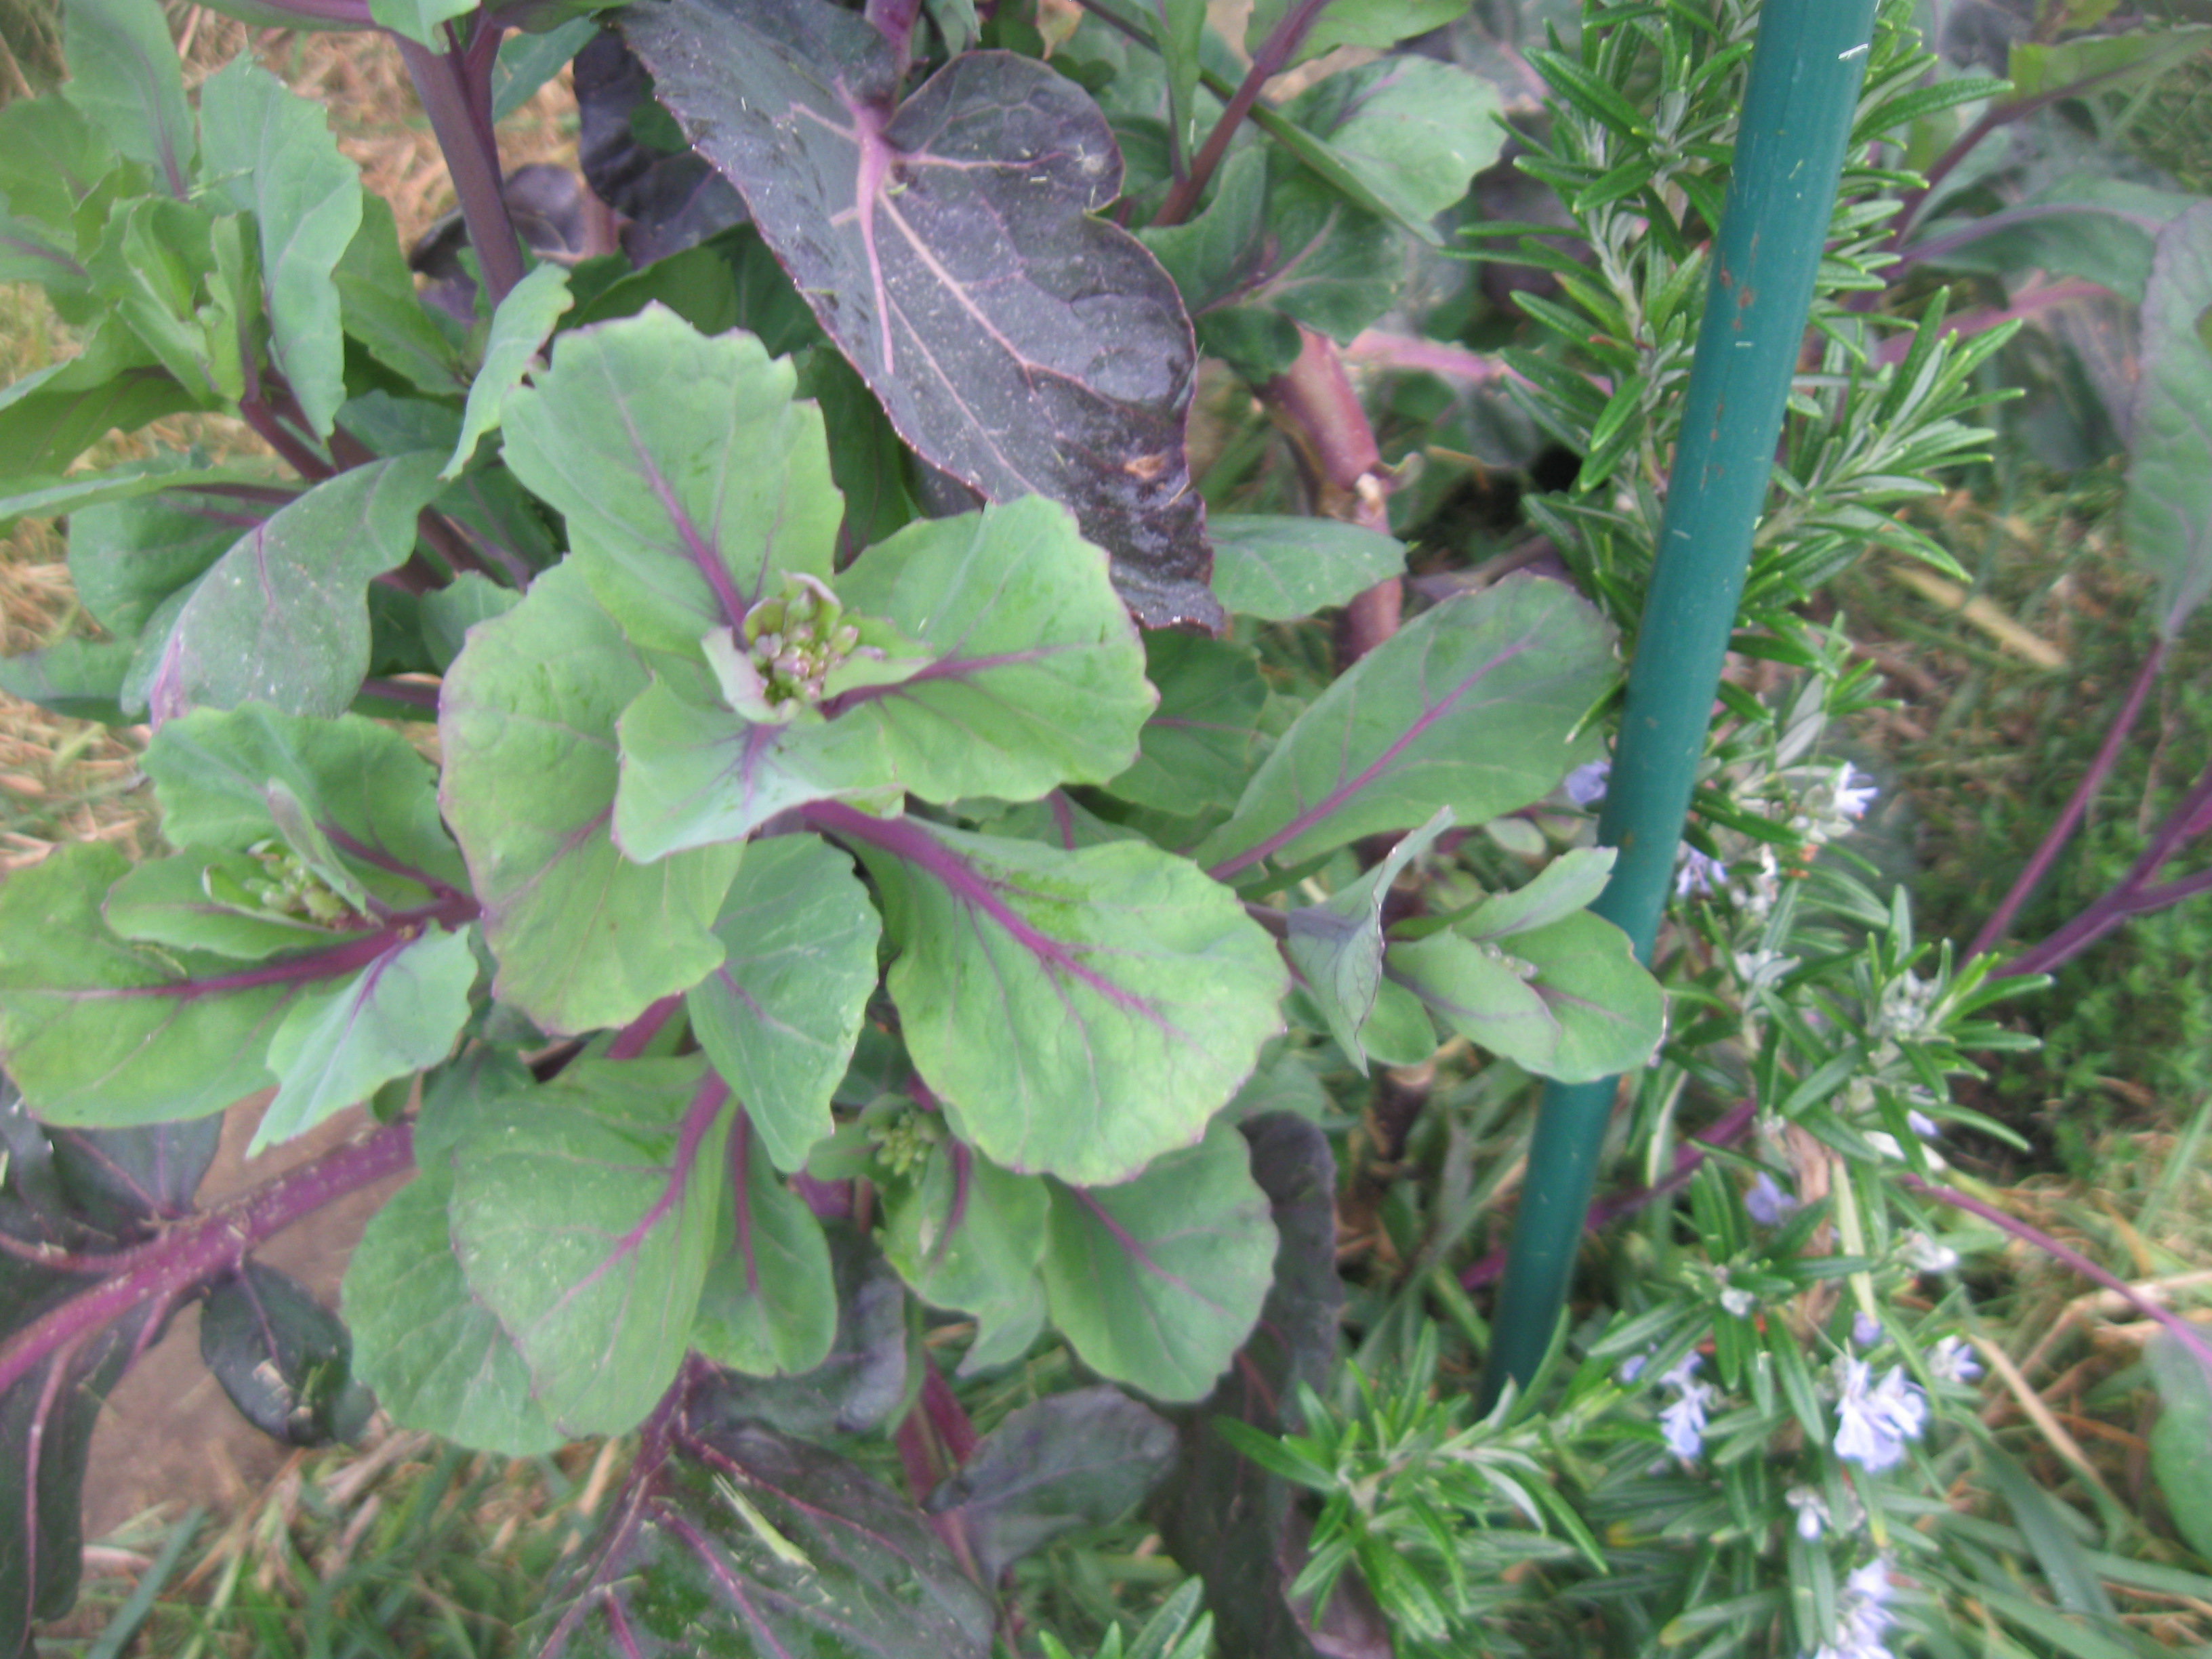
You may notice a bunch of herbs growing in this garden above, amongst the Brassica’s and other green vege. I do this kind of companion planting to help the plants improve their health, to deter troublesome insects and generally grow a better crop with a large yield. The best herbs to plant with the Brassica family (which includes Cabbage, Broccoli, Cauliflower, Kale, Turnip) are listed below:
– Dill
– Coriander (not near Fennel)
– Chervil
– Savoury
– Mint (but not near Parsley)
– Rosemary
– Sage
-Tansy
– Chamomile
– Oregano
– Thyme
– Hyssop
– Yarrow
& Orange Nasturtiums only – Yellow ones attract Aphids for some unknown reason!
NOTE: DO NOT plant Rue anywhere near Brassica’s/Cabbages, etc., they hate it.
Also, don’t forget that encouraging beneficial or “good” insects into your garden will help you deal with the “bad” or problematic ones. Ladybirds and Praying Mantis are 2 great ones for dealing with Aphids, and Lacewings if you are blessed enough to have them, are great too. Remember that if you kill the “bad” bugs you will also kill the “good” bugs so a balance between the 2 of them is always best. I always like to think of Nature as working best without intervention and when everything is being used together, as it is in the world outside of our carefully tended “food” gardens.
A last minute tour of the rest of what is happening in the gardens…

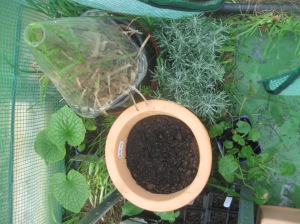
Great excitement – if you can see them! (the little green specks in the middle of the potting mix) are our latest lot of container Carrots. We always seem to run out of Carrots so we are growing them everywhere, in anything. We also have the dreaded wireworm and they seem to attack Carrots as well as Potatoes and other rootcrops, so it pays for us to – as much as possible – plant our root crops out of the ground.
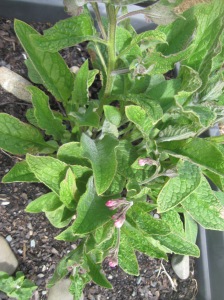
The Comfrey is about to flower too, which is pretty and amazing. I have never had Comfrey flower before! I first got Comfrey on the coast, and along with many of our plants, it did not make it the 900km journey back to home when we moved, so this is the first year my next lot of Comfrey has decided to flower. They look like they will be beautiful flowers. I must admit that I may have prevented the poor Comfrey from doing its flowering thing last year tho, as I cut it back pretty hard to make fertilizer.


The White Cabbage Butterfly netting is proving to be just as effective as usual, as you will see when I post up my harvest photos a little later in this blog. I don’t know what I ever did without the stuff – oh yeah I do, I lost heaps of my plants every year. Yes, it cost a bit to buy, and no I don’t really like using non organic materials in our gardens, but for the benefit it gives us, I really don’t feel like I have much choice. We put is over nearly all of our Brassicas, but always leave a few of the older ones that are going to seed out, both to draw the Butterflies away from the main crop and to give the caterpillars something to eat, as I don’t feel good starving any animal! lol.
What else have we been up to around the gardens? Well, it’s GINGER planting time again!! Every year in mid-winter, I buy a Ginger rhizome from an organic store somewhere and put it a warm, dark cupboard in my kitchen. I watch for signs of it waking up and starting to shoot, and then I grab it and cut it up and plant it (well the shoots anyway), and then chop up the rest and pickle it to use in cooking. 🙂 I have had such success with my Ginger, that this year I have ordered a Tumeric rhizome as well, from Russell Fransham at Subtropicals, and just I can’t wait for it to arrive. I will post more later on in the year about how successful I am at growing Tumeric.
Each of the little shoots you can see below growing out is a potential new plant. I cut a generous portion of Ginger root (rhizome) off the plant with each shoot, and place into a ceramic pot filled with rich compost and keep it moist and in a VERY warm place (this year my greenhouse) all summer, and then when it starts cooling off at night, I bring it inside by the fire. when the leaves start to brown off, I dig it up and harvest the root. I have not yet managed to grow enough to keep my own root to grow from the next year, but this year I am going to try. I will see how it goes! 🙂


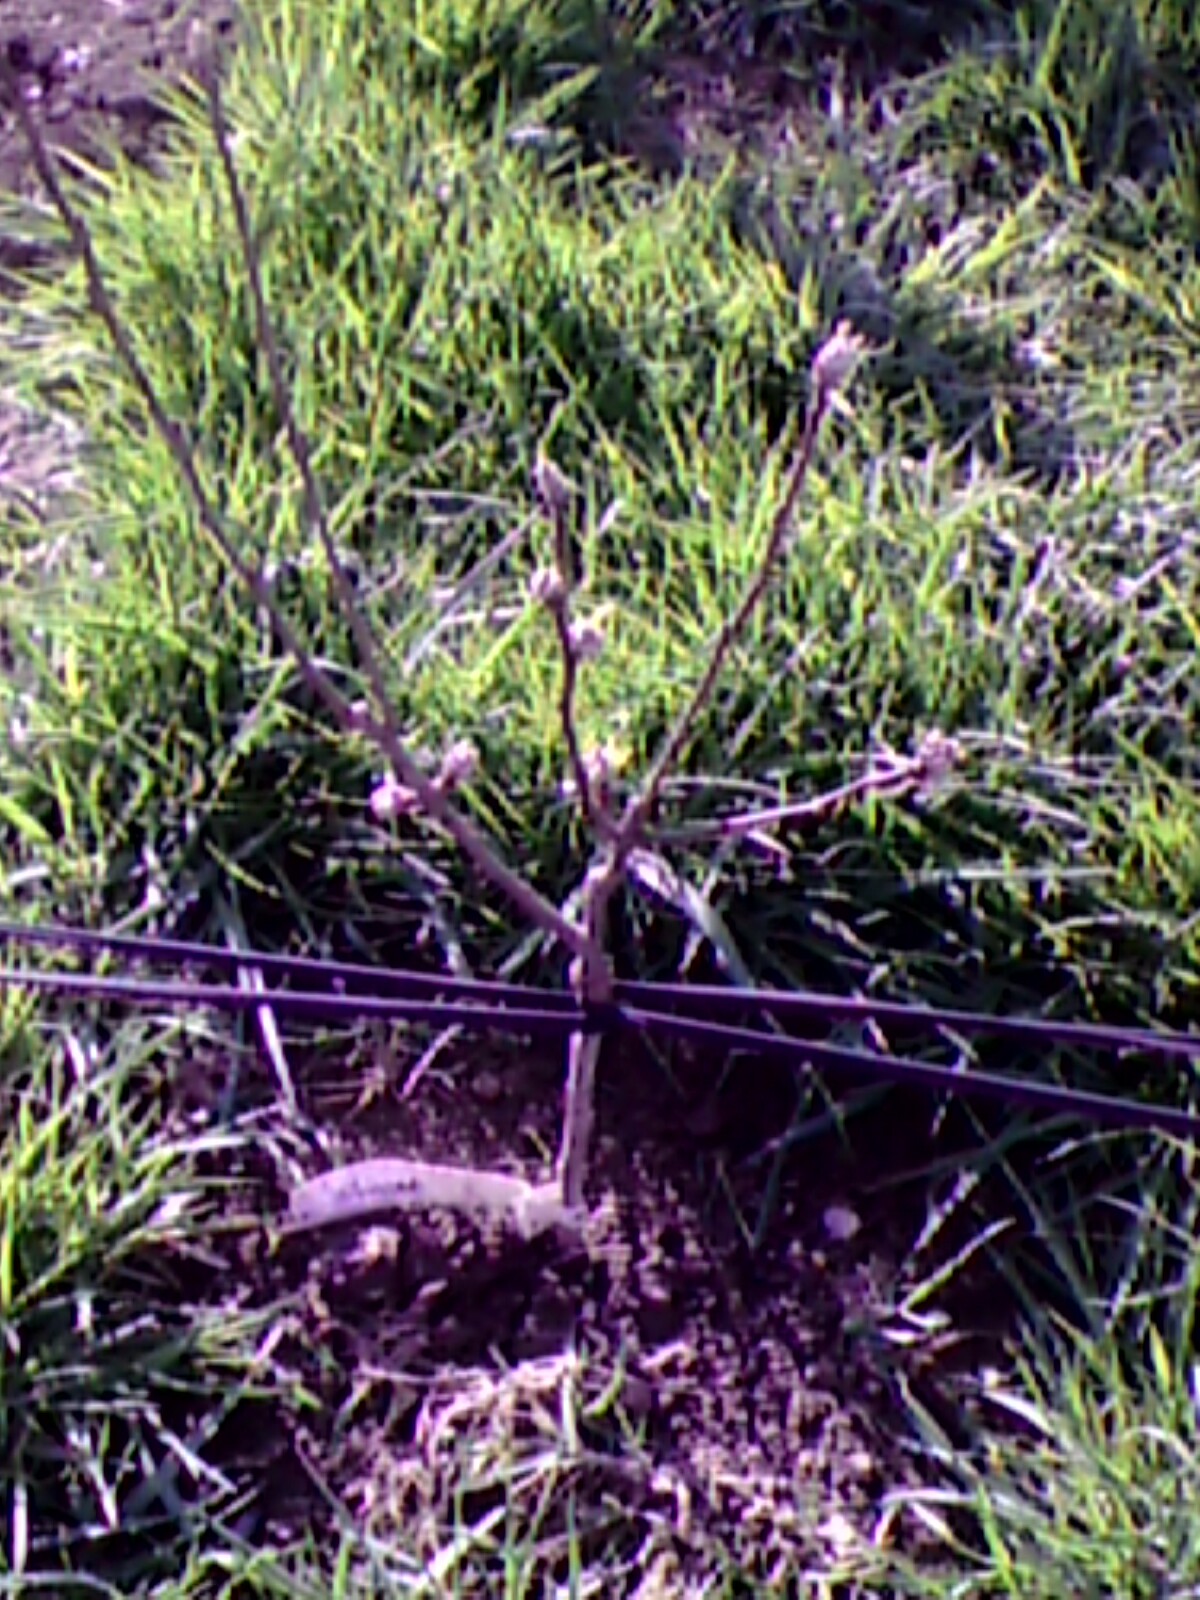
Good start to edging/mulching and under-planting the Orchard – the first one I did was the Monty’s Surprise Apple. The herbs I am going to put under it are nearly big enough to dig in, I think that will be next weekend’s job! If you want to do this, the best herbs/plants for deterring insects and diseases from Orchards/Fruit Trees, are:
– Chives
– Marigolds
– Garlic
– Comfrey
– Lemon Balm
– Mustard
– Nasturtiums
– Spinach/Silverbeet
– Tansy
– Yarrow
NOTE: some are more just companion plants that will help the trees grow better.

I am so blessed, a friend that came to visit over the weekend and see the gardens, bought me a Solomon’s Seal plant! They are great to use medicinally and even the young shoots can be eaten as a food source (the older ones not, they can be toxic).
My long awaited box of herbs from Millstream Herbs arrived at last on Thursday! I usually try to grow all my own herbs, or beg, borrow, steal (after asking!) from my friends. But sadly most of my friends down here destroy their “weeds”, which I usually want to save for medicines!! And some herbs/weeds that I want to grow, you simply cannot buy seed of them, not for love or money. So, I had to purchase some.


Sadly the couriers broke the Solomons Seal plant that I had ordered from Millstream (forgetting that I had my friend bringing me one from her neighbour – so now I have 2!) and the beautiful branch of flowers had snapped in half and it seemed such a shame to waste it, so from the flower garden I picked some of the bulb flowers that our only previous tenant who had bothered to garden, had planted and left here. This is the arrangement I came up with; it smells and looks so pretty on our table inside:

Finally, we get to the harvest for this week!
The highlight was these beautiful Cauliflowers, the last 2 surviving from our winter crop of 20 that we planted. We harvested 6 of them, the other 12 sadly rotted to death in the freezing cold and ice. I don’t think we will bother to grow so many in the dead of winter again, but then other years when it was not SO cold, they did alright.


We also harvested a bunch of Kale (Cavolo Nero – my favourite)

A large Savoy Cabbage (we tend to try to grow them more as leafy Cabbages than hearting Cabbages as we use the leaves to make Rice Rollups (stuffed Cabbage leaves) and so having lots of little leaves in a tight heart is not very helpful for this!

We usually pick off all the larger outer leaves and use them, and leave one or two on the plant to allow the Cabbage to carry on growing and produce even MORE leaves for us to use and pick off and eventually it will heart up and we will cut it off near the bottom of the stalk but before the last outside leaves; we then use the heart for stir-fry but as we have left the stalk and bottom couple of leaves, it will re-grow again and give us little baby Savoy Cabbages with wee sized hearts, a bit like a wrinkly green Brussel Sprouts! The key to living off the land, is use everything you can. 🙂


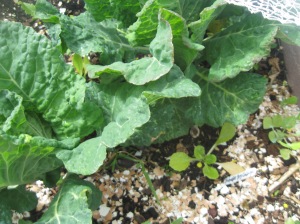
Some baby Carrots (Carrot Thinnings) off our next crop, which is comprised of White Belgium, Giant Orange, Paris Market and Berlicum. There are also some Bartowich Parsley thinnings in that lot as well. These are the carrots that I grew over winter to try out, but I did not think it worked very well, as they did not seem to grow at all; but now it is warming up, they are taking off and they don’t seem to be stringy or tough! So, it might have worked better than we thought, and if so, we WILL do it again. 🙂 [The over-wintered Carrots are seen below, with the Onions growing between them.]


We also harvested the below, (but I forgot to take photos as I was SO busy):
– a big bag of Collard greens
– a big bag of Asian greens
– a big bag of Kohl Rabi leaves
– a smaller bag of Brassica seed heads (or what we use as sprouting Broccoli)
– a smaller bag of mixed Kale
– a large bag of Silverbeet
– a good bowl of green salad (Winter Mesclun, Spinach) etc. for our visitors lunch
Once again… whoever you are and where-ever you are and whatever it is you are growing, I wish you prosperity in your gardening efforts and peace in your life. I trust you enjoy getting the earth beneath your feet, the sun on your face, the smell of fresh picked produce on your hands, and the benefits in your stomach! From Suz X
© 2014-2015: “Garden to Kitchen” with Suz – All content on this blog is Copyright.


